Actions and conditions are tools that are found inside of email automations. If the emails you’re sending are the bones of the sequence, the actions are the muscle movement and the conditions are the brain, telling the muscles which way to move.
They are the key to up-leveling your welcome sequence game, so let’s dive in for a quick exploration of how they work and when to use them.
Inside this blog, we’ll explore the available Actions you can choose from in order to sort and move your subscribers through your workflows. In the next blog installment, we’ll talk through Conditions.
Let’s dive into Actions, shall we?
Actions are the functions your workflow performs for the subscriber. They can be timing delays, segment and group movement, and subscriber management.
Here’s what the choices look like inside most email management platforms.
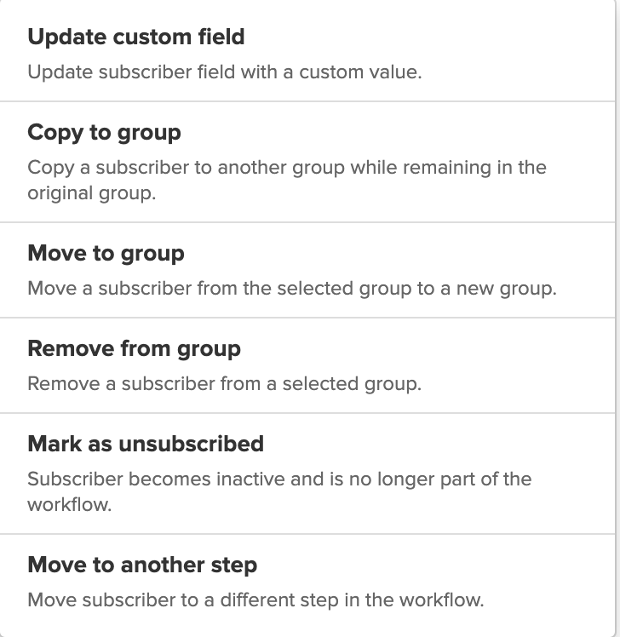
Let’s run through each of these and how you’d use them.
- Update custom field: Subscriber fields are snippets of info about your subscriber that you enter when they are in the process of subscribing. Fields like, first and last name, address, birth date, email, etc. You can ask your workflow to update one of these fields inside of your workflow.
Example: I’m starting to collect birthdays from my subscribers so I can send them a book on their birthday. I’d create an action to collect this date and update each subscriber as they enter it automatically. - Copy To Group: This just places the subscriber into a group, but also allows them to remain in the original group they were in when they triggered the workflow.
Example: I usually copy to the group: In A Workflow at the beginning of every workflow so that I can exclude the subscriber from regular newsletters. - Move To Group: This action will move your subscriber right out of the group they are in and into a new group.
Example: I use this when I want to remove a subscriber from the group I use “in a workflow” (which tells me to exclude those inside a workflow) when they have gone through the entire sequence. I no longer need them in that group. - Remove From Group: The subscriber is just removed from the group. Nothing else happens.
Example: Instead of moving a subscriber out of a group and into another, this action just removes the subscriber. You can use this when you want the subscriber in scenario #3 to stay in their original group but still be removed from the “in a workflow” group. - Mark As Unsubscribed: The subscriber is marked as inactive and is no longer part of the workflow. So, they’re both removed from the active side of the overall general list and are no longer a part of the workflow.
Example: This could be used in the final stage of the workflow for those subscribers who have gone through the entire sequence and not opened any of the emails. However, I’d advise you to sort them into a re-engagement group and move them through a workflow each quarter that gives them one last chance to open your emails BUT you must be excluding them from all of your general newsletters.
This classification of subscribers can really bring your open rates down. - Move To Another Step: This will take the subscriber and simply insert them into a different step in the workflow.
Example: I’ve used this action when I have built a lengthy workflow with little mini workflows inside of the larger workflow. For instance, I’ve delivered the free read, then a second follow-up email and if they didn’t open the free read, I’d like to give that subscriber a reminder it’s waiting for them as the next email in the sequence.
But for those who did open the lead magnet, I’d like them to skip that email and jump to the email that moves them along in the sequence, so I’ll insert the condition (want to learn about conditions? Check out next week’s blog.) to move those that have opened and clicked temporarily out of the mini workflow. Then I’ll give them an action to move them to a new step that starts farther down the workflow line.
To sum up, actions inside your workflows are going to allow you to qualify the subscribers who move into your list in a much more effective way. You’re going to be able to take the data that emerges from their journey through your sequences and build customized emails that get higher open and click rates because you’re sorting subscribers based on their ACTIONS.
Key Actions To Always Insert:
- Always tag someone as ‘In A Workflow’ or use similar verbiage. Then make sure you’re excluding them from general newsletter deliveries.
- Always remove them from this group once they’ve completed the workflow so they are free to receive your general news.
- Always tag or group your subscribers on their way out of the sequence with one common tag, like General Newsletter or My List. Then you’ve got a clear condition to give your workflows. “If they are a member of this group, do NOT deliver them this workflow.”
Stay tuned for our next blog when we talk about Conditions and how to use them in tandem with your workflow actions for a customized subscriber experience.